Navigate a World
Open a project and choose Features → Navigation Editor. The Navigation workspace exposes the NAVIGATION panel, where you can define navigable areas, inspect a static path, and adjust agent movement constraints.
Start with a small scene containing a walkable area and an obstacle. You'll use that scene to see how the path changes around the obstruction.
Define navigation bounds
Open NavMesh Bounds Volumes and select + Add Bounds Volume. A new volume appears in the list and is selected for editing.
- Select the volume and adjust its Center coordinates to position it over the area you want Actors to traverse.
- Adjust Size to cover the walkable region, including space above its surface.
- Use Enabled to include or exclude the volume.
- Add more volumes if the World contains multiple areas. They combine when navigation is built.
- Use Remove to delete an unwanted volume.
Bounds volumes are saved with the World. The editor can show their outlines in the viewport.
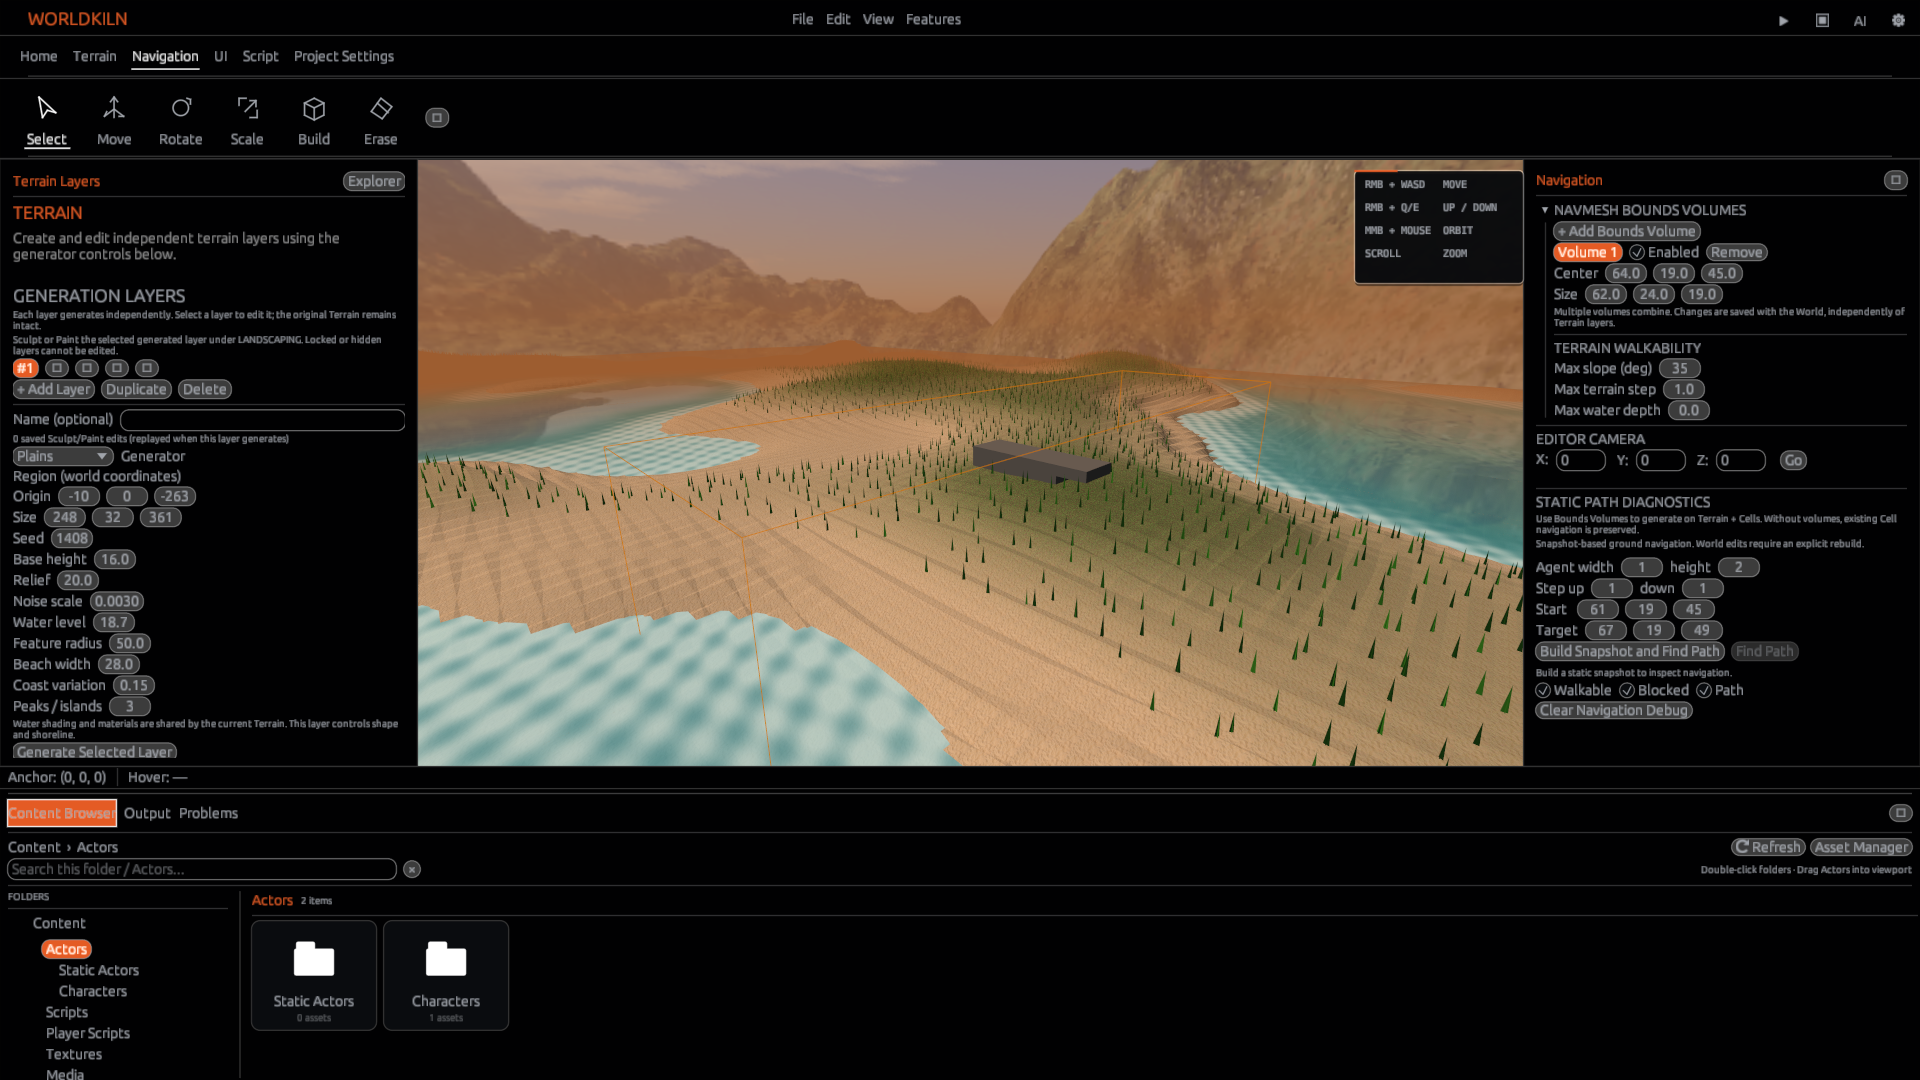
Terrain walkability
Within the same panel, set:
| Control | Effect |
|---|---|
| Max slope (deg) | Highest traversable Terrain slope, from 0 to 88 degrees |
| Max terrain step | Maximum step difference accepted when building Terrain navigation |
| Max water depth | Water depth allowed along a path |
Adjust these values before building a navigation snapshot. For example, reducing Max slope makes steep hills less likely to appear walkable. The bounds volume and walkability controls work together with Terrain and Cells.
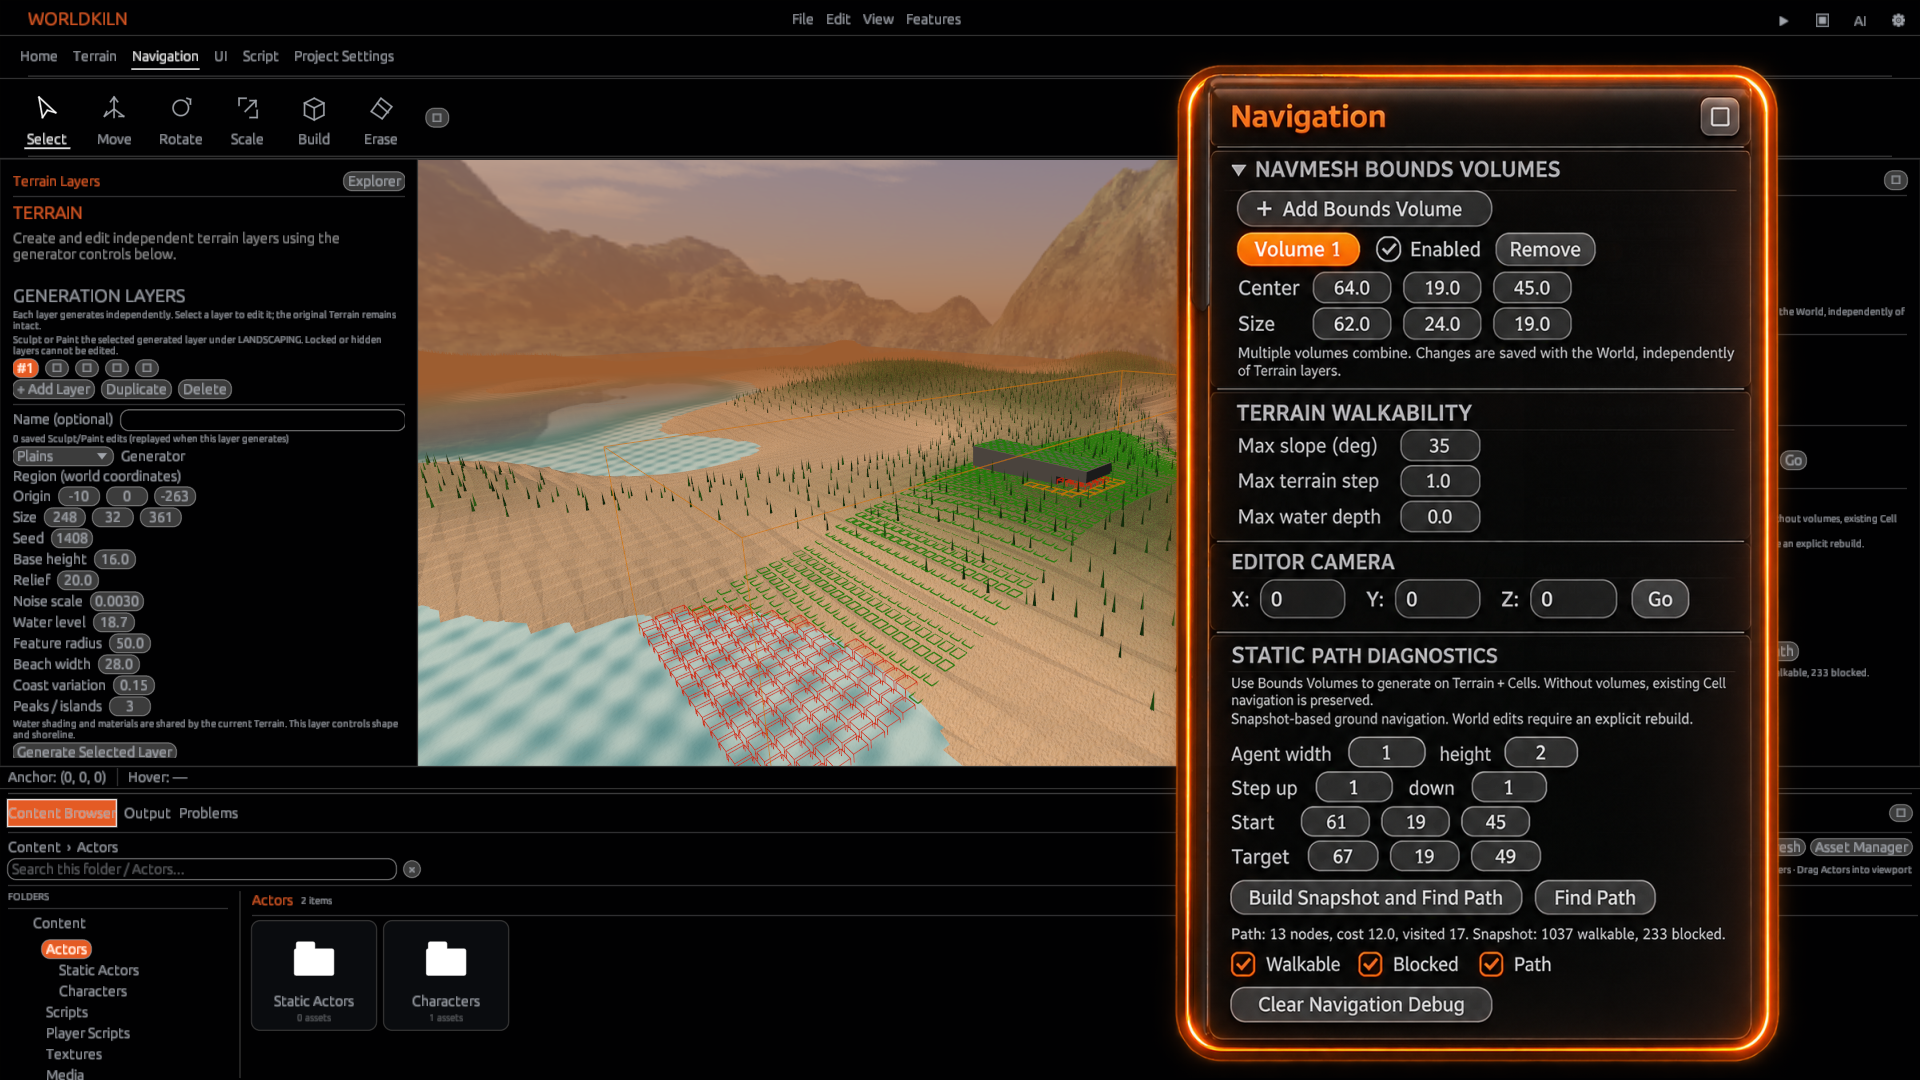
Build and inspect a path
Expand Static Path Diagnostics. This section creates a snapshot of traversable space and computes a path between the supplied coordinates.
- Set Agent width and height for the test Actor's clearance.
- Set Step up and down to describe the step heights the test Actor can cross.
- Enter the Start and Target coordinates.
- Click Build Snapshot and Find Path.
- Read the status shown below the buttons and inspect the result in the viewport.
Use the display checkboxes to choose what you see:
- Walkable — traversable navigation cells.
- Blocked — cells excluded from traversal.
- Path — the computed route.
Change Start or Target, then choose Find Path to run another query using the current snapshot. You can compare routes without rebuilding an unchanged World.
Update the snapshot
After changing World geometry, Terrain, agent dimensions, or navigation settings, use Build Snapshot and Find Path again. The panel marks an out-of-date snapshot as Stale.
Clear Navigation Debug removes the diagnostic display and result. To move the editing viewpoint to particular world coordinates, enter X, Y, and Z under Editor Camera and click Go.
Move an Actor with AeoScript
Use the Actor navigation functions to start and manage movement during Play.
const guard = proj.find("Guard")
if guard != nil {
    guard.navigate_to([12, 0, 8], 3.5, 0.25)
}
The destination is [x, y, z]; the additional arguments set movement speed and arrival distance. Use actor.is_navigating() to check movement and actor.cancel_navigation() to cancel it.
Navigation also exposes finished and failed events for scripts that need to react when movement ends. See Actor navigation and AeoScript events.
Test and troubleshoot
Begin with Build Snapshot and Find Path. If the route does not appear, check the panel's result, Start and Target, the navigation bounds, and the Walkable/Blocked display. Change one setting and rebuild to compare the effect.
Once the static path looks right, start Play and test the Actor's movement. Use Output to read script messages and navigation events.
Next: Characters, Physics, and Actor API.